It's been a very long time since I've posted to my blog. Check out my new post of my first attempt at lace knitting here.
Here is a pic keep you going before you click the link.
Sunday, November 10, 2019
Tuesday, May 1, 2018
HAED Bridge of Wings, has some progress!
Hey all, I have finally managed to get a post up about my HAED project Bridge of Wings and guess what, I finished the first row! Head on over to Pull the Other Thread for the full post.
Here is a sneak peek photo wet your appetite:
Wednesday, March 21, 2018
Hand Knit Socks, Socks and More Socks
Miracles do happen, a post has finally hit my blog! To read about my
hand-knit Hermione Everyday and Moss Stitch Socks use this link to go straight to the post. I hope you enjoy the read!
Also I have been posting a fair amount of my current project progress on Instagram and FB so make sure you follow along with those, you can find links at the top right of Pull the Other Thread's Main Page. I would love to see you guys there and hear your thoughts on my WIPs.
And now a sneak peek photo:
| Hermione Everyday Socks in Progress |
Wednesday, November 15, 2017
Sirdar Yo-yo Crew neck jumper – Hand Knit Finish
Hi there, I know I have been away from the blogging world for quite a while now but I finally have a new post up. It is about a knitting project I have talked about here before but i wrote a new post on my new blog.
CLICK HERE to check it out!
Here is a pic of the finished piece to make it interesting. I hope to see some of you at my new blog home!
CLICK HERE to check it out!
Here is a pic of the finished piece to make it interesting. I hope to see some of you at my new blog home!
Sunday, July 23, 2017
Very First HAED Finish!
Hey everyone, I'm super excited to share todays post with you all, it's QS Clara all finished and ready for framing. Go check out the post here!! Also a little preview picture of her in all her glory.
Tuesday, July 18, 2017
Hand Knit Finish - Hermione Everyday Socks
Wow everyone, I have managed to get another post up on my blog! After being away from blogging for so long I have a few things to share over the next few weeks. While I was away, my stitching bug was absent for a bit, but I did do some crafting in the form of knitting. Go check out my blog post on these Hermione Everyday Socks, which includes a link to the free pattern!! Click Here
Wednesday, July 12, 2017
Dimensions Gold Elegance of the Orient - Finished
Well guys it finally happened, I finished Elegance of the Orient. The post on this project is now up on my new blog www.pulltheotherthread.com, so go check it out HERE
Sunday, February 19, 2017
Dimensions Gold - Elegance of the Orient, Nearly There!
Hey guys, I've a new post up on my new blog. I'm very excited. Link Here
Sneak Peek of the piece:
![]() |
| Sneak Peek of Elegance of the Orient Progress. Click the link above to see the rest of this post, including more pictures. |
Sunday, February 12, 2017
Hand Knit Slouch Socks Finish
Hey everyone, Sunday has rolled around again and that means it's time to share what crafty thing I have been up to. However I would like to start this post with an update on my new blogging home. Last week I set up the hosting and made a start on the layout of the new website. I have kept it quite simple for now but there will be changes to it over the coming months, as I get to grips with the Wordpress software. I would love some feedback from my awesome readers on it, so if you get a chance, check it out and let me know what you think, link here.
So now that is out of the way, we can get back to the fun stuff. While in my local craft shop recently I found a gorgeous yarn call Tivoli Haven. It is super chunky and soft so I bought a couple of balls to make some nice comfie slouch socks. However having gotten my yarn I couldn't find any patterns online that used Aran (8wpi) weight with 8mm needles. At first I was despondent but then I decided I could make them myself, if I knew how to calculate the number of cast on stitches I needed!
As it turned out there was a bit more to it than that, especially in the heel turn and the toe decreases but all I needed to know first was how to figure out the number of cast on stitches. Luckily the internet came to the rescue and I found great instructions on how to work this out, here.
So I now knew the cast on, based on the yarn gauge and foot size, was 24 stitches. I was delighted, so I made a start on my ribbing. I decided to go with 2x2 but I think it would have been better to use 1x1 instead, due to the size of the needles.
These socks knit up extremely quickly and before I knew it I had the the length I wanted and I needed to do the heel flap. So back to the internet I went again to find out how long this should be. I discovered another great site called Hands Occupied, which I would end up using for the rest of the math on this project. Soon I had one fully completed sock, I felt so proud. The second sock was just a matter of repeating the same steps, luckily I had kept notes for each stage on the Knit Tink app, so it was very straight forward.
Now I am the owner of a crazy comfortable pair of slouch socks, that have been hardly off my feet since they came off the blockers. If I could get away with it I would wear these to work! I was so delighted with the result that I am now making another pair for my OH in earth tone yarn. I can't wait to finish them for him.
This was a tricky project and I did make a few mistakes. When picking up the gusset stitches on one of the socks I didn't pick up one of them correctly and there is a slight hole. The other issue is with the gusset size, I think I made the heel flap a bit too long and picked up too many stitches for my size feet, making them a slightly too big. This is something I will research, but for now the fact that they are a bit large doesn't really matter.
So that's it for my super comfortable slouch hand-knit socks, what do you think? Would you ever try to make something without a pattern? Let me know your thoughts in the comments below.
Sunday, February 5, 2017
Lavender & Lace: Celtic Spring Cross Stitch Progress
Hey everyone, welcome to February, hopefully we will start seeing some nice Spring greenery soon. Speaking of Spring, in my continuing attempts to avoid working on Elegance of the Orient, last post here, I have some progress to show on my Celtic Lady! I really do feel bad that Elegance has once again been passed over, however at least I didn't start something new, that makes it ok, right?
I was looking for a project that had some nice areas of block colour and no back stitching that needed to be done immediately. I wasn't really in the mood for a HAED project, even though Bridge of Wings has some large sections of just one colour. I wanted something that made me feel like I was making tangible progress and Celtic Spring fit that requirement perfectly.
I worked on the swirls of metallic stitching, using 1 strand of the treasure braid instead of 2. I started filling in some of the gaps left from my last session with this piece and worked my way down towards the bottom of the gown. I also got to stitch the shoe, which for some reason I really like. I think it's that it really conveys she is in motion.
I also finished all the cross stitches in her bouquet and I love how it turned out. The yellow roses look so delicate. There is still some more beading to do under the flowers but I'm happy with the progress I made. I was very tempted to fill in her head piece but it's mostly beading and I wasn't in the mood for bead confetti so that will have to wait.
These pictures show the colour of the fabric I'm using quite accurately, which was an issue I was having with my other photos. It's a very delicate pink colour and the evenweave is so soft and comfortable to work with. I even find that the metallics don't shred that much with this fabric, making them much easier to use.
When I manage to get around to this project, it stitches up quite quickly. Hopefully when I start the other season ladies, I won't leave them wallow unfinished for so long.
Well that's my cross stitch project post for this week, hope you enjoyed it. Don't forget to follow me on the various social media. I pop up a sneak peep of what my post will be about on Twitter and Instagram on Fridays, so check that out to get an early clue of what's coming up.
Sunday, January 29, 2017
Pretty, Patterned, Cotton Socks
Hey everyone, hope you are all getting in lots of creative time. We have been pretty busy here but I have managed to do some crafting here and there. Since I knit my first pair of socks, see here for that post, I have been a bit sock mad. There are just so many amazing patterns out there, many with really beautiful designs. I was itching to try a decorative pair but wasn't too confident in my sock knitting skills.
I did finally pluck up my courage and settled on a free pattern that looked relatively straight forward, link here. The pattern called for 100% cotton yarn, luckily I had a bought a couple of balls of pastel variegated cotton yarn fairly cheap, so I decided to make a start. I went with the medium sized pattern, as I have long but narrow feet. They turned out fairly well, even if I did make a huge number of mistakes along the way, so here they are!
At first I tried the k3p3 ribbing for the cuff, but didn't like how it turned out so I changed to the optional ribbing pattern instead. This worked out much better for me and I was happier with how it looked. The next step was the 4 row repeat for the design, here is where things got tricky. I'm not sure how many times I had to rip back and re-do sections because I made a mistake, but it was a lot.
It was really nice when I got past the heel turn and was only doing the pattern repeats on the instep rather than the whole sock. I kept track of my rows, using a great app called Knit Tink. This meant I knew exactly how many I needed to do for the second sock. Unfortunately I did made a big error when I was closing the second sock. I use kitchener stitch to finish off the toes and I did it in the wrong direction on the second one. You can see the difference in the photos below, the first was done correctly, the second incorrectly.
They both should have a rounded toe, opps. I didn't want to start trying to rip back the closing stitches, so I left it alone. These were fairly challenging to knit, I needed to constantly pay attention to what I was doing, otherwise I ended up making errors in the pattern repeats. However all the stitches are knit or purl, just the order changes to create the design. I'm pretty happy with the result and the mistake in the kitchener stitch doesn't seem to affect how comfortable they are.
I have continued to add so many more amazing sock patterns to my Pinterest boards so I'm sure you will be seeing more on my blog in the future. If you want to keep up with some of the patterns I'm adding to my to-do list, follow along with me on Pinterest. That's all for now guys!
I did finally pluck up my courage and settled on a free pattern that looked relatively straight forward, link here. The pattern called for 100% cotton yarn, luckily I had a bought a couple of balls of pastel variegated cotton yarn fairly cheap, so I decided to make a start. I went with the medium sized pattern, as I have long but narrow feet. They turned out fairly well, even if I did make a huge number of mistakes along the way, so here they are!
![]() |
| Finished 100% Cotton Hand-Knit Socks, Blocking |
At first I tried the k3p3 ribbing for the cuff, but didn't like how it turned out so I changed to the optional ribbing pattern instead. This worked out much better for me and I was happier with how it looked. The next step was the 4 row repeat for the design, here is where things got tricky. I'm not sure how many times I had to rip back and re-do sections because I made a mistake, but it was a lot.
![]() |
| Hand-Knit Socks - 4 row repeating pattern |
It was really nice when I got past the heel turn and was only doing the pattern repeats on the instep rather than the whole sock. I kept track of my rows, using a great app called Knit Tink. This meant I knew exactly how many I needed to do for the second sock. Unfortunately I did made a big error when I was closing the second sock. I use kitchener stitch to finish off the toes and I did it in the wrong direction on the second one. You can see the difference in the photos below, the first was done correctly, the second incorrectly.
![]() |
| Correct Kitchener Stitch Close |
![]() |
| Awful Kitchener Stitch Close |
They both should have a rounded toe, opps. I didn't want to start trying to rip back the closing stitches, so I left it alone. These were fairly challenging to knit, I needed to constantly pay attention to what I was doing, otherwise I ended up making errors in the pattern repeats. However all the stitches are knit or purl, just the order changes to create the design. I'm pretty happy with the result and the mistake in the kitchener stitch doesn't seem to affect how comfortable they are.
I have continued to add so many more amazing sock patterns to my Pinterest boards so I'm sure you will be seeing more on my blog in the future. If you want to keep up with some of the patterns I'm adding to my to-do list, follow along with me on Pinterest. That's all for now guys!
Monday, January 23, 2017
Blossoming Spring Cross Stitch Finish
Hey all, I hope everyone is making it through January alright. As many of you know, Blogger has undergone a number of changes recently and I have found a lot of them have made the blogging experience extremely frustrating. As a result of this I will be moving my blog to a paid hosting service over the next few months. Not to worry though, I will give plenty of notice of everything that is happening and I hope you will all continue to follow along with me in my new blogging home.
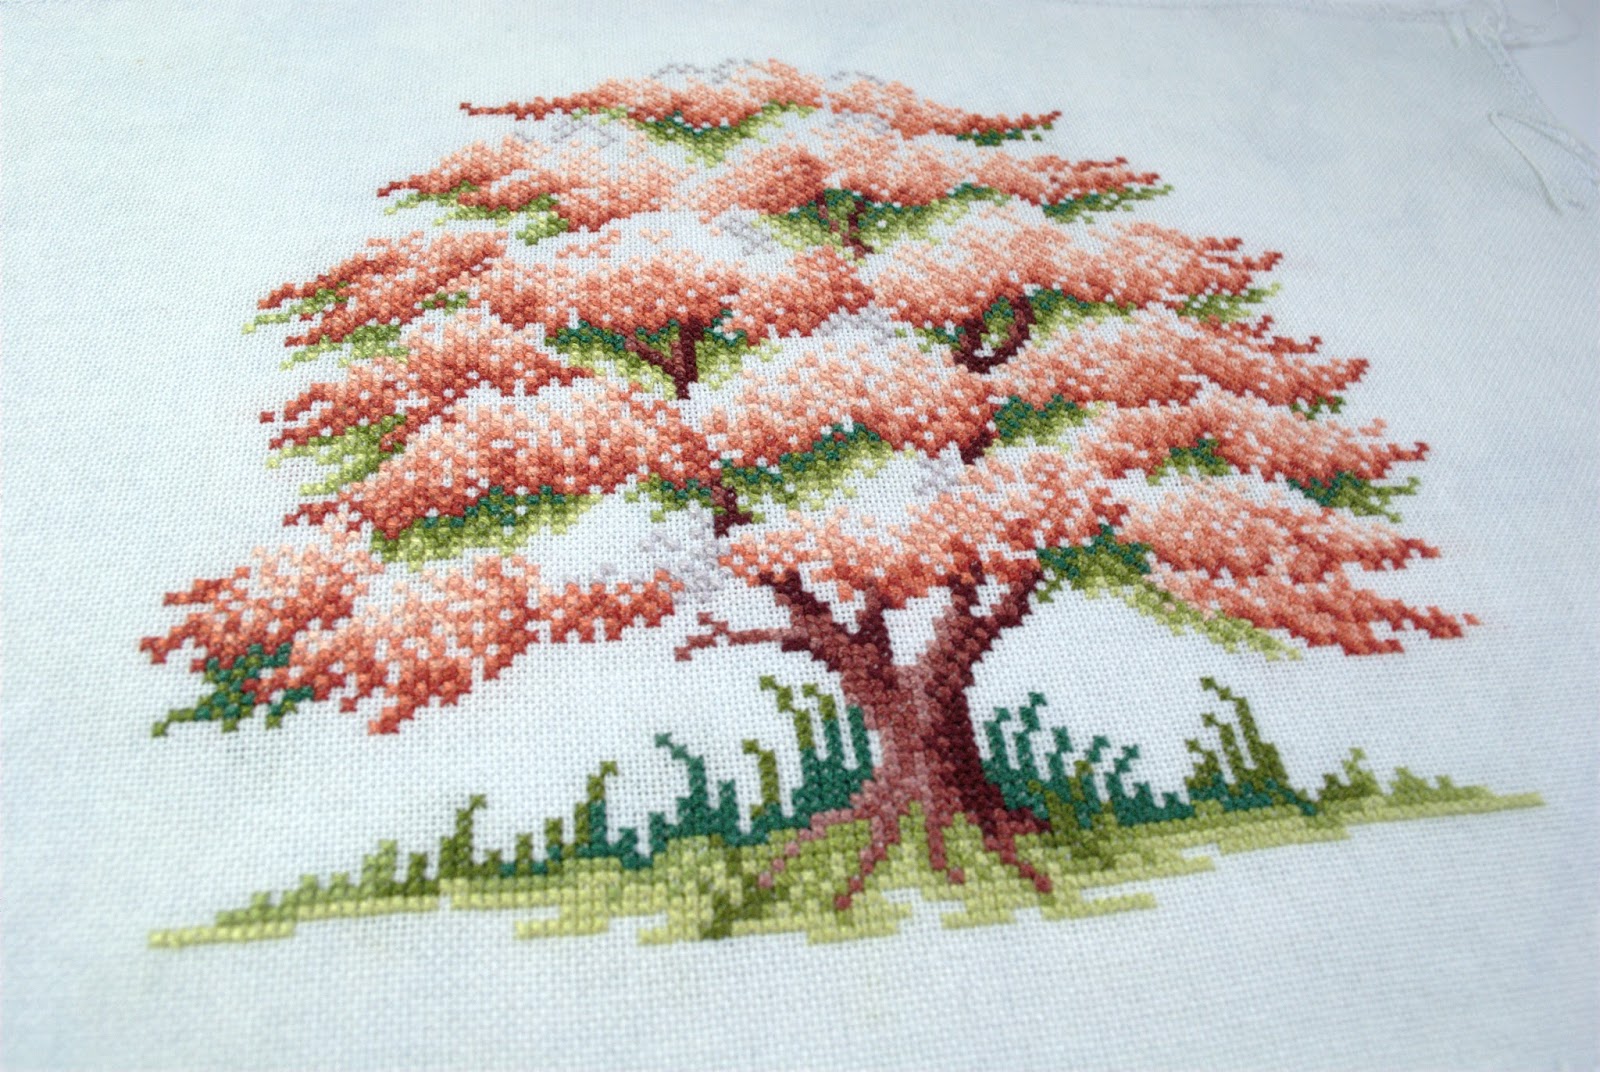
Anyway back to crafting, I'm delighted to report, I have my first cross stitch finish of 2017! I took out Blossoming Spring the other day and was shocked at how little was left to be done. I thought that there was a fair amount of stitching left on this piece. However only the top cluster of blossoms needed finishing. The last progress report on this project can be found here for those interested.
This piece was stitched on 28ct hand-dyed evenweave from Sparklies, using DMC threads 2 over 2. Usually when I stitch on hand-dyed fabric I keep the bag so that I know the name of the colourway for it, however I can't seem to find the one for this fabric and I can't remember what this is called. It's a very subtle combination of pale blues and greys.
I have really enjoyed this project, even though it has taken me over 2 years to stitch it. I actually feel pretty bad about how long this has been a WIP, because realistically I could have finished this project fairly quickly if I didn't keep jumping from piece to piece. However that's one of the things I love about being creative, matching a project to my mood.
I'm delighted to have been able to cross this project off my to-do list and I adore how it looks. It will now go with my other finishes waiting to be properly completed. I think this one will be going into a frame, if I can find one that suits. I have also been working on some more pairs of hand knit socks, see my first ones here, so they will be showing up soon. I think I may be addicted to knitting socks, have added so many patterns to my Pinterest, opps.
Well that's everything, don't forget to follow me on Instagram, Facebook and Pinterest for other stuff from me, links on the top right of the page.
Anyway back to crafting, I'm delighted to report, I have my first cross stitch finish of 2017! I took out Blossoming Spring the other day and was shocked at how little was left to be done. I thought that there was a fair amount of stitching left on this piece. However only the top cluster of blossoms needed finishing. The last progress report on this project can be found here for those interested.
![]() |
| Blossoming Spring - Japanese Crab Apple - Sheila Hudson |
This piece was stitched on 28ct hand-dyed evenweave from Sparklies, using DMC threads 2 over 2. Usually when I stitch on hand-dyed fabric I keep the bag so that I know the name of the colourway for it, however I can't seem to find the one for this fabric and I can't remember what this is called. It's a very subtle combination of pale blues and greys.
![]() |
| Chart from 'The Ultimate Forest Friends Cross Stitch Collection' |
I have really enjoyed this project, even though it has taken me over 2 years to stitch it. I actually feel pretty bad about how long this has been a WIP, because realistically I could have finished this project fairly quickly if I didn't keep jumping from piece to piece. However that's one of the things I love about being creative, matching a project to my mood.
![]() |
| Can't believe this took over 2 years *hangs head in shame* |
I'm delighted to have been able to cross this project off my to-do list and I adore how it looks. It will now go with my other finishes waiting to be properly completed. I think this one will be going into a frame, if I can find one that suits. I have also been working on some more pairs of hand knit socks, see my first ones here, so they will be showing up soon. I think I may be addicted to knitting socks, have added so many patterns to my Pinterest, opps.
Well that's everything, don't forget to follow me on Instagram, Facebook and Pinterest for other stuff from me, links on the top right of the page.
Tuesday, January 10, 2017
First Pair of Hand Knit Socks!!
Hey everyone, hope you all had a lovely holiday season and New Year.
Have you made any resolutions? I haven't made any concrete craft plans for this
year but I'm really hoping to get Elegance of the Orient finished. I
would also like to make some progress on HAED QS Clara. You can find my last posts on these pieces here and here. Another project that needs some attention is my Sirdar Blur cardigan, it only needs to be
blocked, stitched together and the decorative piece around the front
knit, last post on this is here.
Now enough about all the projects I haven't finished, today's post is about one I did complete. For a long time now I have been seeing hand knit socks online, and they always look amazing. However the pictures of them in progress made it look so complicated, just so many needles at once! Well I decided to get myself some yarn and a set of double pointed needles (DPNs), look up a tutorial and give it a go. Why not, right?
Well to my surprise it actually turned out to be some what easier than I thought it would be. I had to use a few different tutorials but the main one was a YouTube video you can find here.
The only things I found difficult to follow on this tutorial were how to do the long tail cast on, joining the round together, and picking up stitches for the gusset. I ended up searching for other videos to clarify these steps.
I used sport weight, acrylic/cotton blend yarn, on 3mm DPNs for these socks, knitting them top down. They are so warm and cozy, as well as being lots of fun to knit. It felt really great to learn something new and get a finished product out of it. I have now saved a number of other patterns I want to do and can't wait to try out different yarns.
This project was a great reminder to me to try new things and not be afraid to make mistakes. I had to rip back the start of these about 9 times before I managed to get it right. However once I got into a rhythm they were straight forward enough, even the heel turning wasn't that difficult. I did make a mistake in picking up the stitches on the gusset and there is a slight hole there, but it's very small and not a huge issue.
Have you tried any new things recently? I would love to hear about them in the comments below!!
Well that's all for today!
Now enough about all the projects I haven't finished, today's post is about one I did complete. For a long time now I have been seeing hand knit socks online, and they always look amazing. However the pictures of them in progress made it look so complicated, just so many needles at once! Well I decided to get myself some yarn and a set of double pointed needles (DPNs), look up a tutorial and give it a go. Why not, right?
![]() |
| Hand Knit Socks, my very first pair! |
Well to my surprise it actually turned out to be some what easier than I thought it would be. I had to use a few different tutorials but the main one was a YouTube video you can find here.
The only things I found difficult to follow on this tutorial were how to do the long tail cast on, joining the round together, and picking up stitches for the gusset. I ended up searching for other videos to clarify these steps.
![]() |
| Don't be afraid to try something new, I did and now I have hand made socks!! |
I used sport weight, acrylic/cotton blend yarn, on 3mm DPNs for these socks, knitting them top down. They are so warm and cozy, as well as being lots of fun to knit. It felt really great to learn something new and get a finished product out of it. I have now saved a number of other patterns I want to do and can't wait to try out different yarns.
This project was a great reminder to me to try new things and not be afraid to make mistakes. I had to rip back the start of these about 9 times before I managed to get it right. However once I got into a rhythm they were straight forward enough, even the heel turning wasn't that difficult. I did make a mistake in picking up the stitches on the gusset and there is a slight hole there, but it's very small and not a huge issue.
Have you tried any new things recently? I would love to hear about them in the comments below!!
Well that's all for today!
Tuesday, December 20, 2016
Christmas Secret Cross Stitch Finally Unveiled
Hey everyone, well Christmas is just around the corner and I think I am pretty well prepared at this stage. Presents have been bought, decorations are up, most of my gift wrapping is done and a super special secret Christmas project is done. This is a piece I had been planning to do for most of the year and now that it has been received by the new owner I can finally share it. I am ridiculously excited to show this off.
Here it is, my handmade Christmas Stocking for a very special member of my family. The cross stitch piece is from Just Cross Stitch Ornament Edition 2014 and it's a SamSarah Designs pattern called First Star. When I saw this piece I fell in love with it, and it is perfect for this project. It is stitched on 28ct antique white evenweave using DMC threads I had in my stash, 2 over 2.
Once the cross stitch was done I started putting the stocking together based on a template made from an old stocking of mine for size and shape. The inside of the Stocking is lined with the grey Christmas tree fabric that I used for the cuff, and there is a layer of batting between the outer layer and the lining to make it nice and squishy. I really took my time with this, carefully cutting out each piece and stitching them together. I even made a practice one out of cheap material and I am grateful I did! Based on the practice run, I decided to stitch the cuff into the sides of the stocking which made it much neater and easier to put together.
I thought that putting the majority of the stocking together would be fairly straight forward but the one thing that I couldn't figure out was how to stitch the lining to the inside so it wouldn't get pulled out. Thankfully the Internet came to the rescue and I used this tutorial to put it together so the lining would stay in place.
I am so delighted with how this project looks and I really hope the recipients love it too. It was super fun to make something so different and figure out the best way to put it all together. Hopefully this will encourage me to continue trying new ways to use my sewing machine and cross stitch finishes.
I want to wish all my readers an amazing Christmas and a wonderful New Year as this is my last post before the Holidays.
![]() |
| Handmade Christmas Stocking with Cross Stitch Piece Cuff |
Here it is, my handmade Christmas Stocking for a very special member of my family. The cross stitch piece is from Just Cross Stitch Ornament Edition 2014 and it's a SamSarah Designs pattern called First Star. When I saw this piece I fell in love with it, and it is perfect for this project. It is stitched on 28ct antique white evenweave using DMC threads I had in my stash, 2 over 2.
![]() |
| First Star by SamSarah Designs - Just Cross Stitch Ornament Ed. 2014 |
Once the cross stitch was done I started putting the stocking together based on a template made from an old stocking of mine for size and shape. The inside of the Stocking is lined with the grey Christmas tree fabric that I used for the cuff, and there is a layer of batting between the outer layer and the lining to make it nice and squishy. I really took my time with this, carefully cutting out each piece and stitching them together. I even made a practice one out of cheap material and I am grateful I did! Based on the practice run, I decided to stitch the cuff into the sides of the stocking which made it much neater and easier to put together.
![]() |
| Stocking nearly ready to send to its new home |
I thought that putting the majority of the stocking together would be fairly straight forward but the one thing that I couldn't figure out was how to stitch the lining to the inside so it wouldn't get pulled out. Thankfully the Internet came to the rescue and I used this tutorial to put it together so the lining would stay in place.
I am so delighted with how this project looks and I really hope the recipients love it too. It was super fun to make something so different and figure out the best way to put it all together. Hopefully this will encourage me to continue trying new ways to use my sewing machine and cross stitch finishes.
I want to wish all my readers an amazing Christmas and a wonderful New Year as this is my last post before the Holidays.
Monday, December 5, 2016
Sirdar Yo-Yo Jumper - Re-Photographed
Hey everyone, how are the Christmas preparations coming on? Well, I hope. I have managed to get most of my gift shopping done but still have the decorations to put up. Will probably go get our tree this weekend. I was super irresponsible lately but I spied an amazing offer on 2x 400g balls of Sirdar Yo-Yo yarn in Caramel on Ebay and I couldn't resist getting them. This reminded me that I have been meaning to post some pictures of my purple yo-yo yarn jumper that were taken recently. The original post I made on this project can be found here, and I think we can all agree the pictures are terrible.
So here I am wearing my super comfie Sirdar yarn jumper. My OH's father very kindly did the photos of this for me and I am delighted with how they came out. I think it really shows off the gradient of colour on this piece.
This is made from pattern 9082. I decided to make the sleeves longer than called for in the pattern as I have fairly long arms and I don't like jumpers that are slightly too short in the sleeves. In fact I added on enough that they come down over my hands, which I adore.
It is a real shame that Sirdar have discontinued this line because it was really fun to knit. This jumper was done using a single 400g ball so the colour changes flow really nicely. I have a couple more yo-yo patterns and a few balls of the yarn in a different colourways. I am definitely looking forward to knitting them up. I have a Sirdar Blur cardigan that is waiting to be blocked and a Blur jumper on the needles so once those are done I think I will tuck into one of the yo-yo patterns.
I would love to hear what you all think of the jumper, let me know in the comments below. I am working away on a surprise cross stitch piece at the moment, so hopefully I can share that soon. It is Christmas themed but needs to be given to the recipient before the big day, keep an eye out for that.
Wednesday, November 30, 2016
Be Jolly Cross Stitch Finish - Mini Cushion Style
Hey there, hope those of you who celebrate Christmas are enjoying the start of the holiday season. To all my American buddies, I hope you had a great Thanksgiving. I have finally made a start on getting ready for Christmas, don't have my decorations up yet, but will sort those some time over the next few weeks. I have been doing some gift shopping, and also made a Christmas ornament finish! This is actually really exciting for me as I have no handmade Christmas decorations! I usually give away most of my pieces.
Looking back through my blog I was fairly appalled to find that this piece was stitched in Feb 2014 and been awaiting finishing all that time. Want to see that post, it's right here! The chart is from Just Cross Stitch Ornament edition 2013, and as far as I can remember I changed all the colours to the DMC equivalents. It was stitched on a piece of 28ct evenweave fabric from a Polstitches grab bag.
This ornament was a very straight forward, simple finish. I used the snowflake fabric for the backing, ran it through the sewing machine, leaving an opening for stuffing. Once I had filled it with polyester soft toy stuffing, I used an invisible ladder stitch to close it. It is a bit too large to hang from the tree so I didn't bother adding a ribbon. I will just pop it on a shelf in the house somewhere.
While I was searching my blog for the original post of this mini project, I was surprised to see how much my photographs have changed. They still aren't perfect by any means but they look a good deal better now than they used to. Don't believe me? Here is the original photo of this piece and a recent shot. What do you think? A big difference?
I am currently working on another Christmas mini for a very special project, hopefully I will be able to share that with you soon.
That's all for now!
![]() |
| Be Jolly Cross Stitch finished as a mini cushion |
![]() |
| Be Jolly Mini Cushion Prep |
![]() |
| Be Jolly Cross Stitch - Just Cross Stitch Ornament Edition 2013 |
![]() |
| Old Terrible 2014 Photo |
![]() |
| New Less Terrible 2016 Photo |
That's all for now!
Monday, November 7, 2016
Bent Creek's Bird Seed Cross Stitch, Finished as a Cube!
Hey everyone, hope you all had a great weekend. Winter is definitely starting to settle in here, temperatures have dropped noticably and the heating is back to running regularly. I'm also making good use of my hand-knit yo-yo jumper/sweater, it's so snuggly warm, just perfect for Winter. I posted a picture of it on my Facebook page recently, click here to check it out and like my page to get updates! I will do a blog post on that in the future, as it recently got a proper photo shoot and I have have lots of lovely pictures of it.
Anyway back to todays post, I have my very first cube finish to show off. I have seen lots of this type of finish around on other blogs and just love it. I have been wanting to try one myself for a while now, so I finally took the plunge and used my Bent Creek Bird Seed finish, posted here, to try it out. I had checked out a few posts showing how to put these together in the past, so I had a good idea of what I needed to do to complete it.
I had two styrofoam blocks I had bought some time ago in my stash. One of these was too big for this project so I used the smaller one. Unfortunately it was too deep, so I ended up cutting it in half with a bread knife. Not the easiest thing I have ever done but it worked. Next time I think I will raid my partner's toolbox and use his saw. Also I will do it outside and not in our kitchen on the chopping board!
I searched through my stash of fabrics and selected a few different ones, before I settled on a tan piece with white polkadots. I pinned the cross stitch to the styrofoam block using flat headed pins, and did the same for the backing fabric. The back of the block was uneven from being cut, so I pinned a piece of batting to the back of the cube under the fabric to even it out.
I used a strip of the same tan fabric to cover the sides and top of the cube. I wanted it to go all the way around but alas I didn't have a long enough piece, so I folded in the edges at the bottom and pinned them in place. The whole thing is finished off with a wide green and narrow tan ribbon.
I'm delighted with how this turned out, it was actually a relatively simple finish. There are a few things I would change the next time I make one of these. I would add in a piece of batting to the front under the stitching, as it adds a bit of dimension to the piece. Also the stitching on the front is slightly tilted, so on the next one I will have to make sure it is straight when pinning it in place. I think it just needed to be stretched slightly to get it to sit properly.
I'm really looking forward to doing more of these cube finishes. The next one I have in mind is the Soda Stitch Harvest of Love, seen here, and I think I have the perfect fabric for it but will have to wait and see. Does anyone have any tips or tricks for these finishes, anything you do differently? If you haven't done one before would you like to try it out? Let me know in the comments below!
That's all for now!
Anyway back to todays post, I have my very first cube finish to show off. I have seen lots of this type of finish around on other blogs and just love it. I have been wanting to try one myself for a while now, so I finally took the plunge and used my Bent Creek Bird Seed finish, posted here, to try it out. I had checked out a few posts showing how to put these together in the past, so I had a good idea of what I needed to do to complete it.
![]() |
| Bent Creek Bird Seed Cross Stitch - Cube Finish |
I had two styrofoam blocks I had bought some time ago in my stash. One of these was too big for this project so I used the smaller one. Unfortunately it was too deep, so I ended up cutting it in half with a bread knife. Not the easiest thing I have ever done but it worked. Next time I think I will raid my partner's toolbox and use his saw. Also I will do it outside and not in our kitchen on the chopping board!
I searched through my stash of fabrics and selected a few different ones, before I settled on a tan piece with white polkadots. I pinned the cross stitch to the styrofoam block using flat headed pins, and did the same for the backing fabric. The back of the block was uneven from being cut, so I pinned a piece of batting to the back of the cube under the fabric to even it out.
![]() |
| Cross Stitch Cube Finish - Back |
I used a strip of the same tan fabric to cover the sides and top of the cube. I wanted it to go all the way around but alas I didn't have a long enough piece, so I folded in the edges at the bottom and pinned them in place. The whole thing is finished off with a wide green and narrow tan ribbon.
I'm delighted with how this turned out, it was actually a relatively simple finish. There are a few things I would change the next time I make one of these. I would add in a piece of batting to the front under the stitching, as it adds a bit of dimension to the piece. Also the stitching on the front is slightly tilted, so on the next one I will have to make sure it is straight when pinning it in place. I think it just needed to be stretched slightly to get it to sit properly.
I'm really looking forward to doing more of these cube finishes. The next one I have in mind is the Soda Stitch Harvest of Love, seen here, and I think I have the perfect fabric for it but will have to wait and see. Does anyone have any tips or tricks for these finishes, anything you do differently? If you haven't done one before would you like to try it out? Let me know in the comments below!
That's all for now!
Monday, October 31, 2016
A Cross Stitch Halloweeny Finish, in time for Halloween!
Hey everyone, here we are on the 31st of October, the spookiest night of the year. Hope all the Halloween preparations are done, for those who celebrate it. We will be having some friends up this evening to watch some cheesy horror movies and munch on junk food. What are your plans, spooky or otherwise? Let us know in the comments below.
Well seeing as it is Halloween I have an appropriate cross stitched ornament to show off. You might remember this from my previous post here. It's a super cute freebie from Durene Jones, and I decided I would make it into a cute hanging ornament to be the first of, hopefully, many Halloween decorations.
The first step was to look through my fabrics and pick out something for the backing that would match the cross stitch. I have a selection of 4" and 5" square pieces for quilting, I bought on Ebay just for this purpose. These small pieces are perfect for cross stitched ornaments as there is a large selection of colours and patterns included for a very reasonable price. This way I don't have to store a ridiculous amount of fabric, but still have lots to choose from for small finishes. I also have the option of stitching a few together if I need a slightly larger piece for a bigger project.
A thorough search through my collection later, and I had a combination of pieces I thought would go great with my Halloween Cat. I was torn between purples and oranges but in the end orange won the day.
The next step was to make up the back panel using the three squares I had chosen. I calculated how large I would need each piece to be, including the seam allowance, so that it would be the right size. Off I went with rotary cutter and mat, cut the three pieces and stitched them together.
All that was left was to choose a matching ribbon. I decided to go with purple rather than orange as it gave the piece a bit of contrast. Once it had all been assembled correctly it went through the sewing machine. As is typical with me I didn't leave a very large opening to turn it the right way and stuff it with the polyester filling but I managed it, with some difficulty. I closed with an invisible ladder stitch, and I now am the proud owner of my first Halloween cross stitch decoration.
I am delighted with this and it is now hanging up above the TV. If you like this cute Halloween Cat make sure you head over to Mii's blog and check out how she finished this piece off as an awesome cube, you can find it here.
Hope everyone has a great Halloween night, enjoy and stay safe.
Well seeing as it is Halloween I have an appropriate cross stitched ornament to show off. You might remember this from my previous post here. It's a super cute freebie from Durene Jones, and I decided I would make it into a cute hanging ornament to be the first of, hopefully, many Halloween decorations.
| Durene Jones Halloween Freebie - Available here |
The first step was to look through my fabrics and pick out something for the backing that would match the cross stitch. I have a selection of 4" and 5" square pieces for quilting, I bought on Ebay just for this purpose. These small pieces are perfect for cross stitched ornaments as there is a large selection of colours and patterns included for a very reasonable price. This way I don't have to store a ridiculous amount of fabric, but still have lots to choose from for small finishes. I also have the option of stitching a few together if I need a slightly larger piece for a bigger project.
A thorough search through my collection later, and I had a combination of pieces I thought would go great with my Halloween Cat. I was torn between purples and oranges but in the end orange won the day.
![]() |
| Halloween Cat Ornament Preparation |
The next step was to make up the back panel using the three squares I had chosen. I calculated how large I would need each piece to be, including the seam allowance, so that it would be the right size. Off I went with rotary cutter and mat, cut the three pieces and stitched them together.
![]() |
| The back panel stitched from 3 pieces of fabric |
All that was left was to choose a matching ribbon. I decided to go with purple rather than orange as it gave the piece a bit of contrast. Once it had all been assembled correctly it went through the sewing machine. As is typical with me I didn't leave a very large opening to turn it the right way and stuff it with the polyester filling but I managed it, with some difficulty. I closed with an invisible ladder stitch, and I now am the proud owner of my first Halloween cross stitch decoration.
![]() |
| The Finished Ornament. How Cute is that?!? |
I am delighted with this and it is now hanging up above the TV. If you like this cute Halloween Cat make sure you head over to Mii's blog and check out how she finished this piece off as an awesome cube, you can find it here.
Hope everyone has a great Halloween night, enjoy and stay safe.
Tuesday, October 25, 2016
Giveaway Winner!!
Hey everyone, I hope you all had a enjoyable and creative weekend. I managed to get some finishing work done and will have a few posts on that in the future. This is a post that I have been meaning to write for a while, the lovely blogger over at Southpaw Stitcher had a giveaway a few weeks ago and I was one of the very lucky winners. Make sure you go check out her blog if you haven't before.
What a super lucky stitcher am I? I was so excited to receive this amazing package. I'm really looking forward to trying these out as they have lots of new techniques that I have not tried before. I really want to stitch the Rose Motif Sampler on some hand dyed fabric and with variegated thread, I think it would look amazing!!
These pattern booklets are quite substantial and a bit intimidating but the instructions look like they are clear and complete. I'm pretty sure I will make more than a few mistakes but that's to be expected with anything unfamiliar.
I haven't made much progress on my cross stitching WIP's but hopefully will get some more crafty time soon. In the meanwhile, have a picture of our fluffy kitty who was keeping me company during a photo session recently. I'm really happy with how this picture turned out, hopefully it's a sign my photography is improving. I just adore how bright and large his eyes came out in this.
That's all for now, see you soon.
![]() |
| Awesome happy mail from Southpaw Stitcher |
What a super lucky stitcher am I? I was so excited to receive this amazing package. I'm really looking forward to trying these out as they have lots of new techniques that I have not tried before. I really want to stitch the Rose Motif Sampler on some hand dyed fabric and with variegated thread, I think it would look amazing!!
These pattern booklets are quite substantial and a bit intimidating but the instructions look like they are clear and complete. I'm pretty sure I will make more than a few mistakes but that's to be expected with anything unfamiliar.
I haven't made much progress on my cross stitching WIP's but hopefully will get some more crafty time soon. In the meanwhile, have a picture of our fluffy kitty who was keeping me company during a photo session recently. I'm really happy with how this picture turned out, hopefully it's a sign my photography is improving. I just adore how bright and large his eyes came out in this.
![]() |
That's all for now, see you soon.
Tuesday, October 18, 2016
My Journey to Improve My Photography - Soda Stitch Harvest of Love
Hey everyone, I hope you all had a lovely weekend and that the week is off to a very creative start.Today's post features a cross stitch finish that has appeared on my blog before. I am re-posting it because I was always unhappy with the photographs I used. In fact there are a number of finishes and WIP's which require new pictures. So the first of the re-photographed finishes I want to share is, Soda Stitch Harvest of Love.
The first picture is from a recent photo session, the second is the original I posted. As you can see the second picture has a blue tint, which doesn't represent the piece correctly. This is because the light at the time I took the picture had a blue cast to it that came through in the photo. This probably could have been corrected if I had changed the white balance setting on my camera but alas I still haven't quite gotten the hang of that, although I am learning.
While the original pictures give a good idea of what the finish looks like, the blue tint doesn't show the colours correctly. The new pictures are more accurate and I am much happier with the results. Seeing these photos together, I am actually fairly surprised by the difference between the old and the new. I hadn't realised how significant the blue cast was on the originals.
There are lots more projects that will be re-photographed in the near future, however there are some that I don't have access to as they were gifts. Hopefully my photographs will continue to improve as I learn more about my camera, photography in general and of course get in that all important, practise!
What do you think of the new photos? Is there a big difference between them and the originals? Let me know in the comments below.
That's all for now!
| Soda Stitch Harvest of Love - New Photo Shoot |
| Soda Stitch Harvest of Love - Original Photo Shoot |
The first picture is from a recent photo session, the second is the original I posted. As you can see the second picture has a blue tint, which doesn't represent the piece correctly. This is because the light at the time I took the picture had a blue cast to it that came through in the photo. This probably could have been corrected if I had changed the white balance setting on my camera but alas I still haven't quite gotten the hang of that, although I am learning.
| Recent Photo Shoot |
| Original Photo Shoot |
While the original pictures give a good idea of what the finish looks like, the blue tint doesn't show the colours correctly. The new pictures are more accurate and I am much happier with the results. Seeing these photos together, I am actually fairly surprised by the difference between the old and the new. I hadn't realised how significant the blue cast was on the originals.
| Soda Stitch Harvest of Love - Love that big grin! |
There are lots more projects that will be re-photographed in the near future, however there are some that I don't have access to as they were gifts. Hopefully my photographs will continue to improve as I learn more about my camera, photography in general and of course get in that all important, practise!
What do you think of the new photos? Is there a big difference between them and the originals? Let me know in the comments below.
That's all for now!
Subscribe to:
Posts (Atom)


